User and Group Management
Last updated: August 14, 2025
Adding users into Teamspective is one of the first things to do to get you started. After that you can assign individuals into Groups or sub-Groups depending on your organization's structure and hierarchy.
Once users are added into the workspace they can start using and benefiting from Teamspectives tools and products.
Add users to Teamspective
There are multiple ways of adding users into the workspace depending on your needs and size. You can:
Invite people based on their email address.
Bulk add all your employees from Slack / Teams.
Integrate your HRIS to automatically sync employees.
Import your employees in bulk via a CSV import.
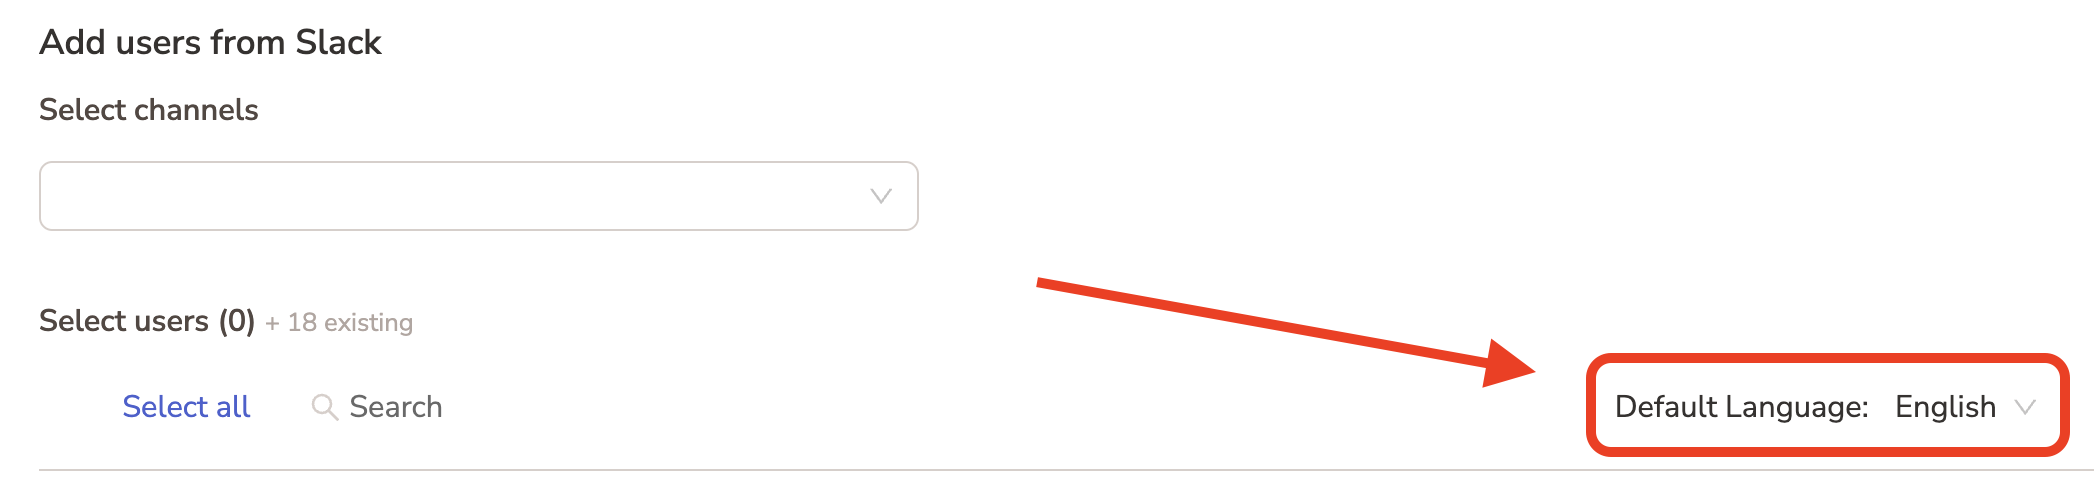
For smaller teams we suggest inviting via email or adding from Slack / Teams. This is quick and straightforward from the Members page:

With both invite methods you can define the default user language:
Organize people to Groups
Organizaing people into Groups will help you get more detailed information from the engagement surveys and help manage feedback requesting more effectively.
If you have an HRIS integration, Groups will be automatically created and managed. You can, however, manually manage a hierarchy within Teamspective. Read more below, in section Creating sub-Groups.
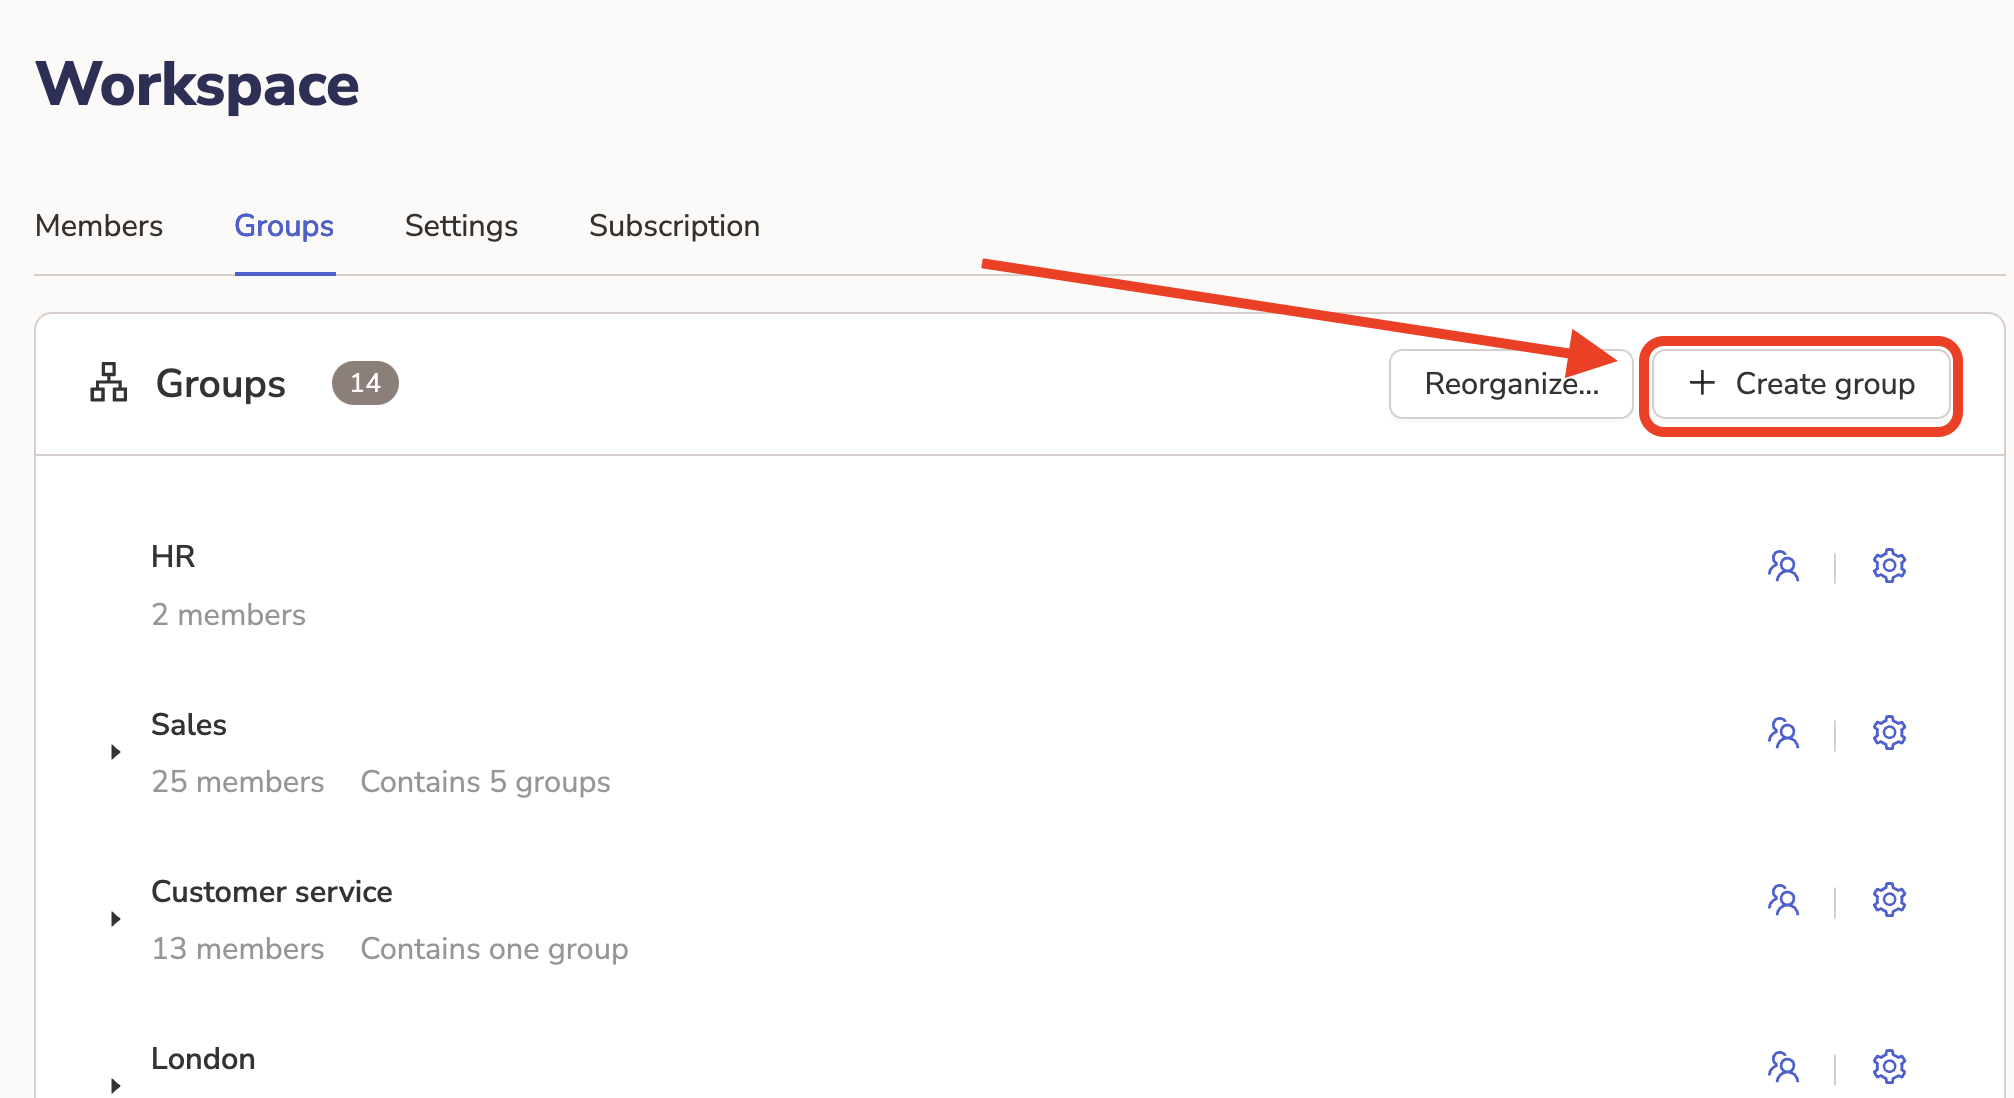
Creating Groups
Navigate to Workspace -> Groups and start creating groups by clicking the Create Group button:
Creating sub-Groups
You can create sub-Groups by using the Reorganize functionality. This will allow you to place groups in a specific hierarchy by dragging and dropiing. You can thus build your organization's hierarchy into Teamspective.
Things to note with sub-Groups:
Every Group Admin will automatically have visibility to all sub-groups' engagement results.
Every member of a sub-Group will automatically belong to the parent group and their engagement results will be calculated to that parent group as well.

Manual reorganizing with HRIS integration
You can reorganize your synced Groups underneath manually created "departments" or "units" in Teamspective.
Click Create group in Teamspective to create the higher level group.
Drag and drop synced integration groups underneath the newly created higher level group.
Teamspective will save this hierarchy and all automatically synced groups from the HRIS will be placed as a sub-group underneath the manually created group in Teamspective.
Assigning Users to Groups
There are 2 ways to manually assign users into Groups:
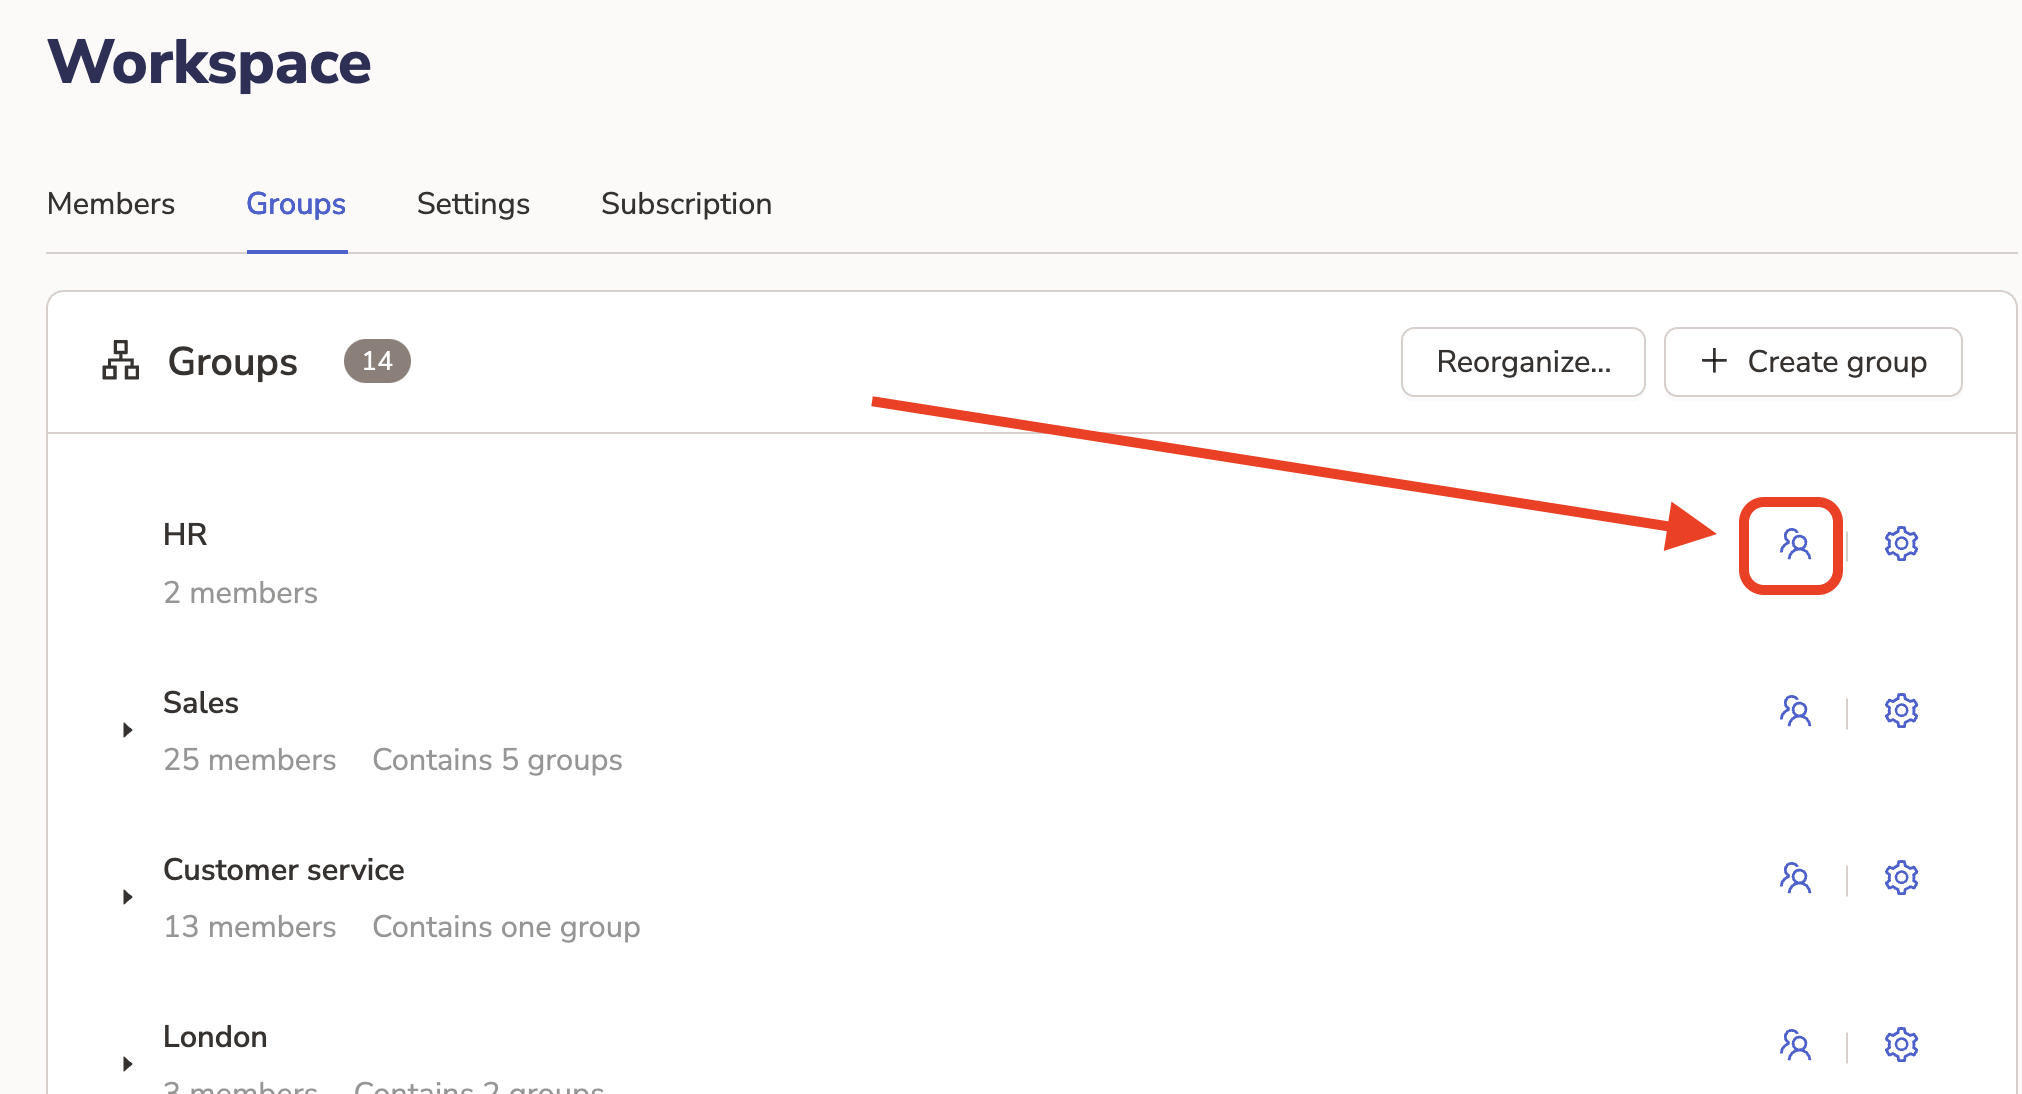
Via Group management
Go to Workspace -> Groups
Click the 👥 icon to add users and manage their role in the group.
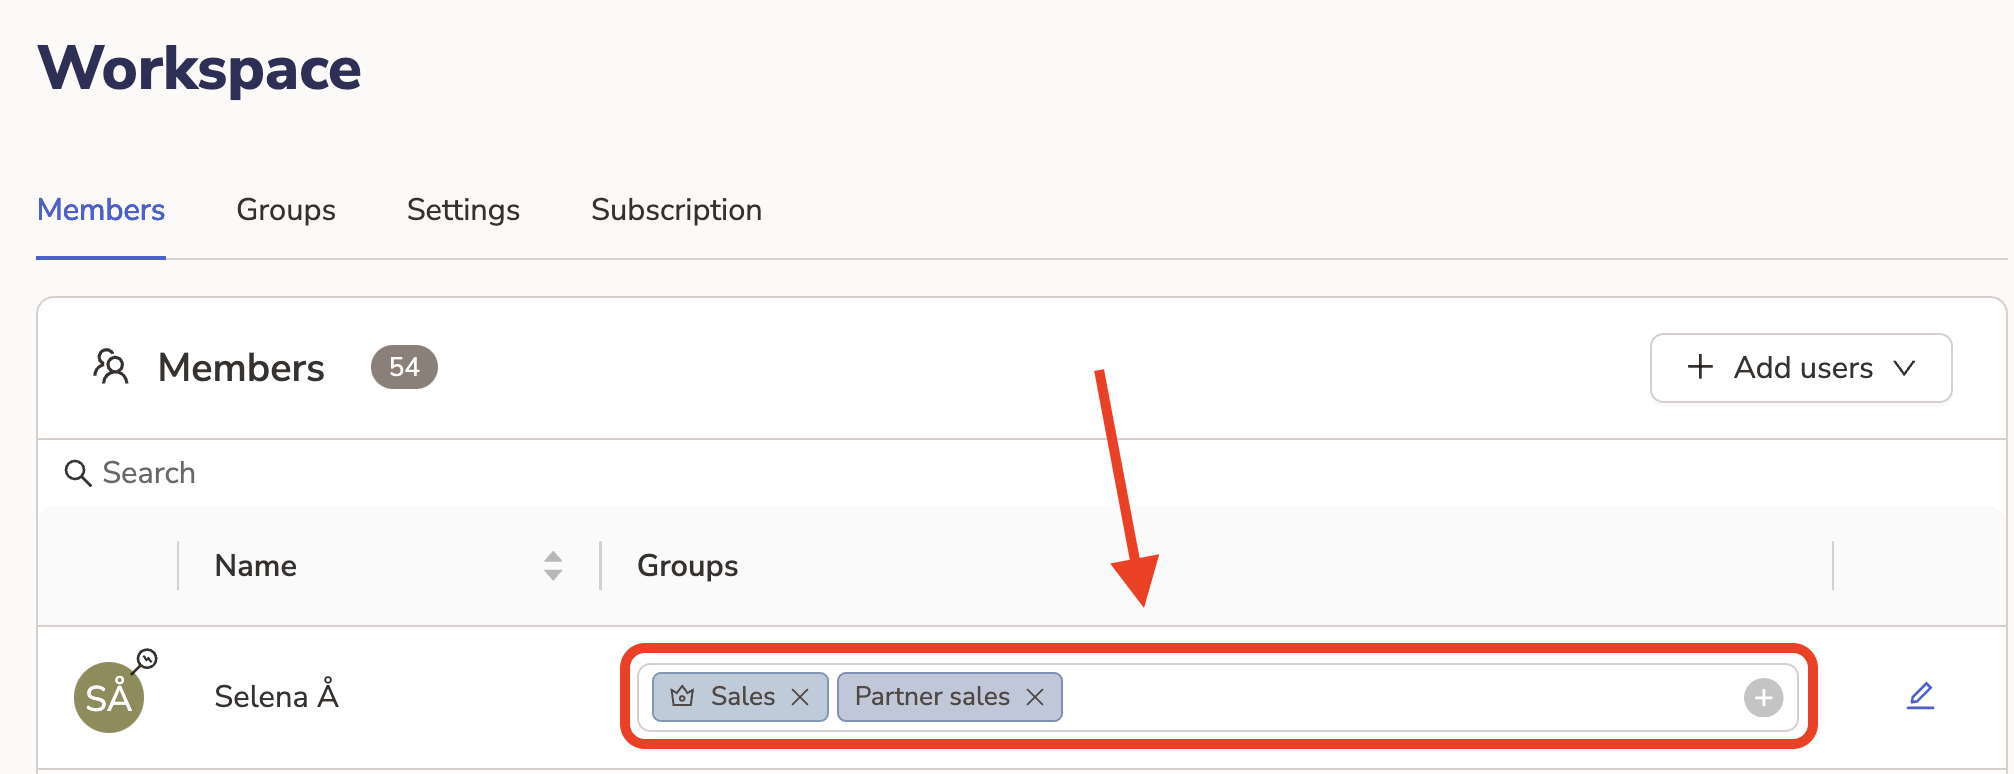
Via Member management
Go to Workspace -> Members
Add the relevant Groups into the group field.
⚠ The automatic sync of the HRIS integration will override any manual changes made to users of synced groups in Teamspective.